「ジオラマカメラ」作成にあたり、今回は色の補正です。
まずは手始めにグレースケールの変更。
ちなみに今回の勉強では以下サイトを参考にしています。
グレースケールのひみつ
どうやってグレースケールにするのか?
方法は前回に記載したピクセルに対してのRGBの各値を取得し、補正するという方法です。しかしグレースケールといってもいろいろな方法があるようです。
今回は代表的なものを4つほど試してみました。
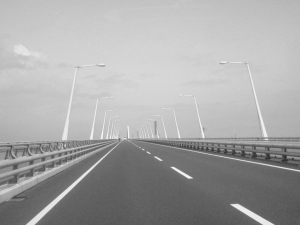
ちなみに今回利用した画像はこちら
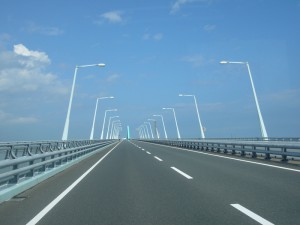
単純平均法
RGBをのそれぞれの平均を出す方法です。
y = ( R + G + B ) / 3
Bitmap bmp = BitmapFactory.decodeResource(getResources(), R.drawable.photo);
int height = bmp.getHeight();
int width  = bmp.getWidth();
int size   = height * width;
int pix[]  = new int[size];
bmp.getPixels(pix, 0, width, 0, 0, width, height);
for (int y = 0; y < height; y++) {
    for (int x = 0; x < width; x++) {
        int idx = x + (y * width);
        int red   = pix[idx] & 0x00ff0000 >> 16;
        int green = pix[idx] & 0x0000ff00 >> 8;
        int blue  = pix[idx] & 0x000000ff;
        int gray  = (red + green + blue) / 3;
        pix[idx] = Color.rgb(gray, gray, gray);
    }
}
Bitmap newBmp = Bitmap.createBitmap(pix, 0, width, width, height, Bitmap.Config.ARGB_8888);
中間値法
RGBのうち最小値と最大値の平均を出す方法です。
y = ( min + max ) / 2
int size   = height * width;
int pix[]  = new int[size];
bmp.getPixels(pix, 0, width, 0, 0, width, height);
for (int y = 0; y < height; y++) {
    for (int x = 0; x < width; x++) {
        int idx = x + (y * width);
        int red   = pix[idx] & 0x00ff0000 >> 16;
        int green = pix[idx] & 0x0000ff00 >> 8;
        int blue  = pix[idx] & 0x000000ff;

        int min = red;
        if (min > green) min = green;
        if (min > blue)  min = blue;
        int max = red;
        if (max < green) max = green;
        if (max < blue)  max = blue;

        int gray  = (min + max) / 2;
        pix[idx] = Color.rgb(gray, gray, gray);
    }
}
Bitmap newBmp = Bitmap.createBitmap(pix, 0, width, width, height, Bitmap.Config.ARGB_8888);
HDTV係数
ITU-R-BT709規格によるガンマ補正を行う方法です。
PhotoShopでもこの方式が採用されているようです。
X = 2.2 // ガンマ補正値
R = ( R ^ X ) * 0.222015
G = ( G ^ X ) * 0.706655
B = ( B ^ X ) * 0.071330
y = ( R + G + B ) ^ ( 1 / X )
Bitmap bmp = BitmapFactory.decodeResource(getResources(), R.drawable.photo);
int height = bmp.getHeight();
int width  = bmp.getWidth();
int size   = height * width;
int pix[]  = new int[size];
bmp.getPixels(pix, 0, width, 0, 0, width, height);
for (int y = 0; y < height; y++) {
    for (int x = 0; x < width; x++) {
        int idx = x + (y * width);
        int red   = pix[idx] & 0x00ff0000 >> 16;
        int green = pix[idx] & 0x0000ff00 >> 8;
        int blue  = pix[idx] & 0x000000ff;

        double cx = 2.2;
        double dRed   = Math.pow(red,   cx) * 0.222015;
        double dGreen = Math.pow(green, cx) * 0.706655;
        double dBlue  = Math.pow(blue,  cx) * 0.071330;
        double dGray  = Math.pow((dRed + dGreen + dBlue), (1 / cx));
        int gray = (int) dGray;

        pix[idx] = Color.rgb(gray, gray, gray);
    }
}
Bitmap newBmp = Bitmap.createBitmap(pix, 0, width, width, height, Bitmap.Config.ARGB_8888);
NTSC係数
RGBそれぞれに重み付けをし平均を出す方法です。
テレビなどの輝度信号(明るさ)の分離方式と同じようです。
y = ( 0.298912 * R ) + ( 0.586611 * G ) + ( 0.114478 * B )
Bitmap bmp = BitmapFactory.decodeResource(getResources(), R.drawable.photo);
int height = bmp.getHeight();
int width  = bmp.getWidth();
int size   = height * width;
int pix[]  = new int[size];
bmp.getPixels(pix, 0, width, 0, 0, width, height);
for (int y = 0; y < height; y++) {
    for (int x = 0; x < width; x++) {
        int idx = x + (y * width);
        int red   = pix[idx] & 0x00ff0000 >> 16;
        int green = pix[idx] & 0x0000ff00 >> 8;
        int blue  = pix[idx] & 0x000000ff;

        double dRed   = red   * 0.222015;
        double dGreen = green * 0.706655;
        double dBlue  = blue  * 0.071330;
        double dGray  = dRed + dGreen + dBlue;
        int gray = (int) dGray;

        pix[idx] = Color.rgb(gray, gray, gray);
    }
}
Bitmap newBmp = Bitmap.createBitmap(pix, 0, width, width, height, Bitmap.Config.ARGB_8888);
まとめ
出力結果を見ると、正直差がわからないです・・・
唯一大きな差を出したのが処理時間です。(htc J Butterflyで測定)
単純平均法:306ms
中間値法:448ms
HDTV係数:21,765ms
NTSC係数:633ms
小数計算やべき乗計算が入ってくると一気に遅くなる状況です。
HDTV係数がPhotoShopで利用されているとは言ってもちょっと処理時間かかりますね。デフォルトはNTSC係数で、必要によってHDTV係数で算出できるようにするのが良いかもです。
しかし、、、どれも見た目は変わらないけど(笑)
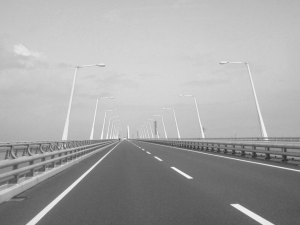
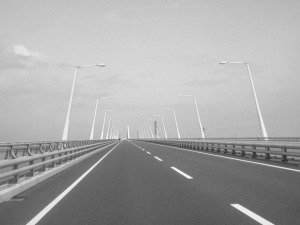
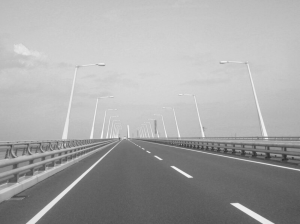

int red = pix[idx] & 0x00ff0000 >> 16;
は
int red = (pix[idx] & 0x00ff0000) >> 16;
のようにカッコでくくってあげないと シフト演算が先に行われてしまい正しい結果になりませんでした。一応ご報告です。